Email Forwarding allows you to automatically forward emails from one email address to another.
Below given are the steps to be followed to setup E-mail forwarding within your cPanel account :
- Log into your cPanel account
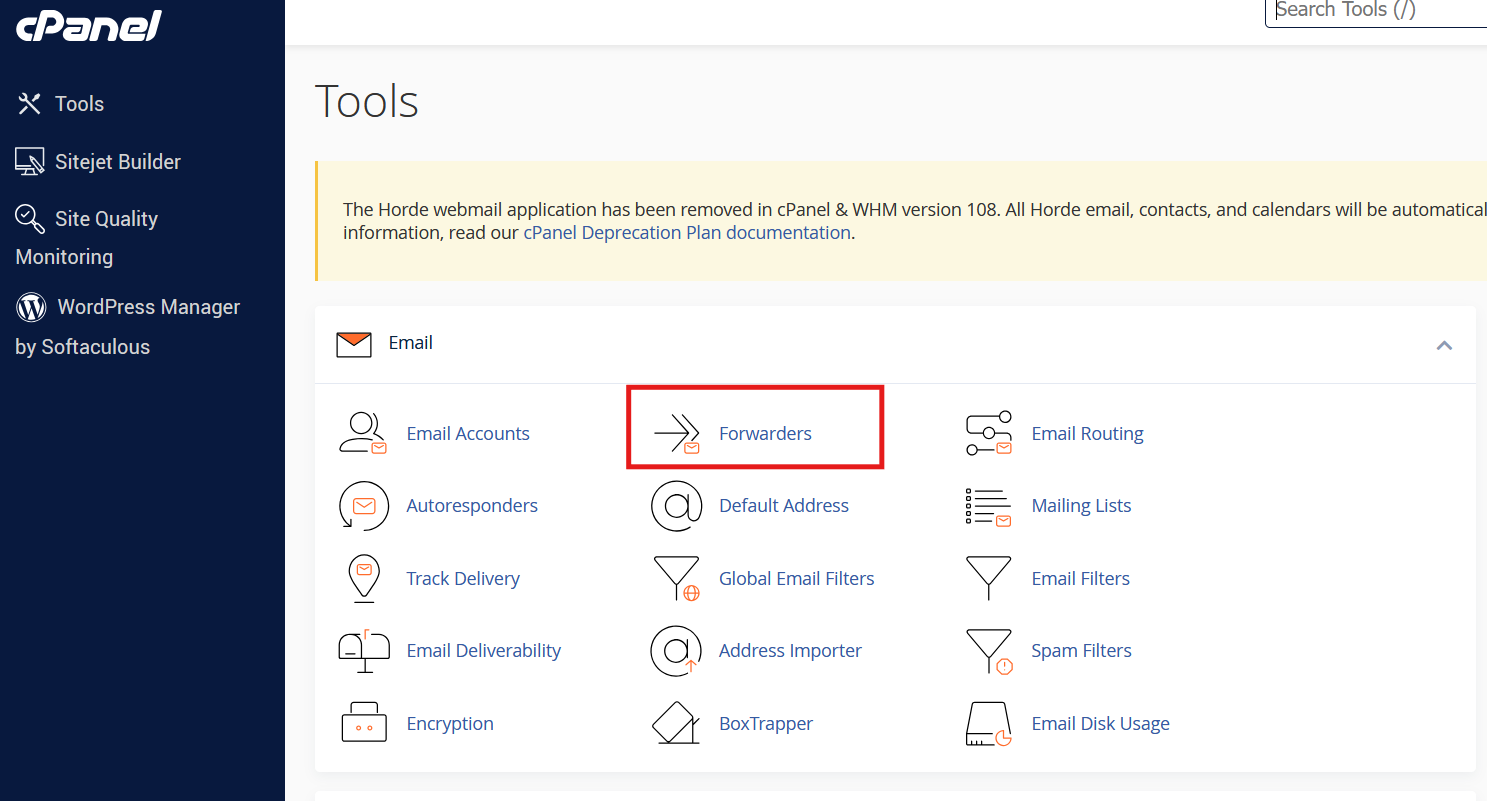
- Under the "Emails" section click on "Forwarders"
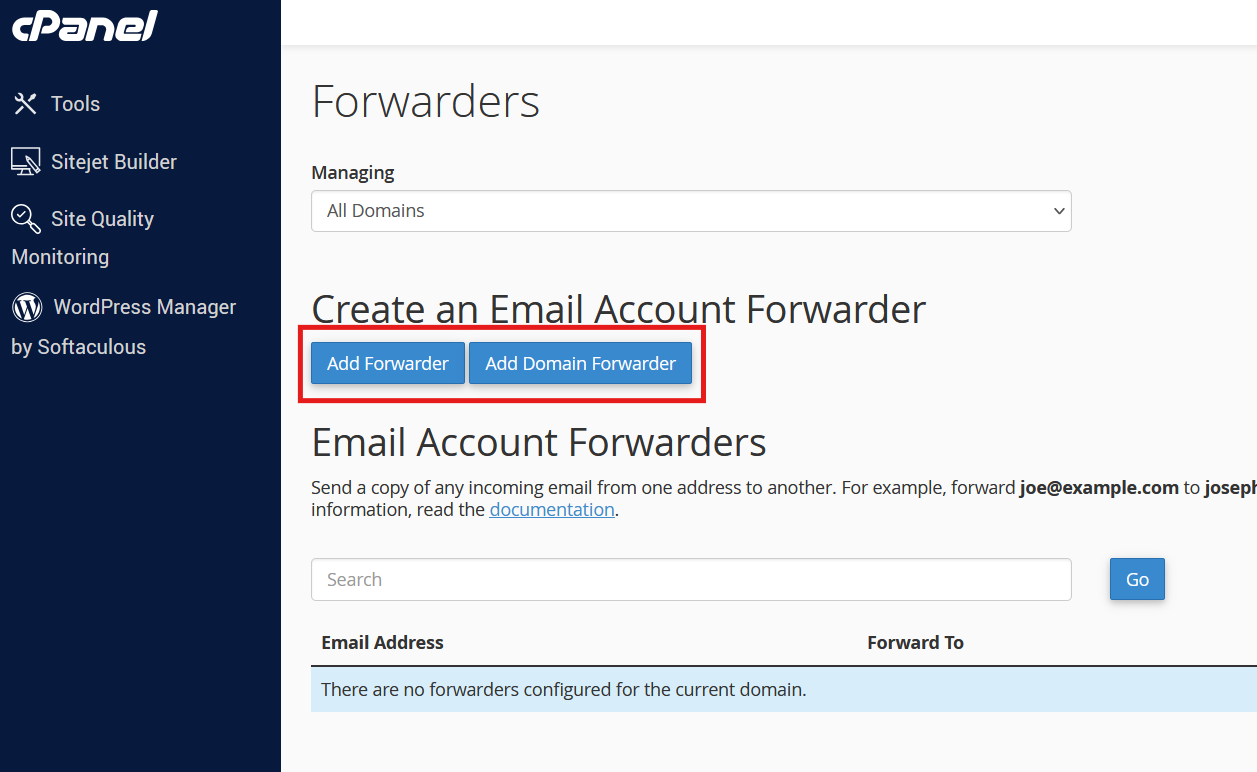
- Once in the "Forwarders" page you will have the options to select either "Add Forwarder" or "Add Domain Forwarder" according to your requirements and needs. Below given is a detailed explanation on what the said options refer to:
- Add Forwarder : Can be used to forward e-mails from a single mail account to a different mail account of your choice. (Steps given below)
- Add Domain Forwarder : Can be used to forward all e-mails from a single domain to another domain of your choice. (Steps given below)
(Visual Representation)


If proceeding with "Add Forwarder" option, kindly follow the below given steps :
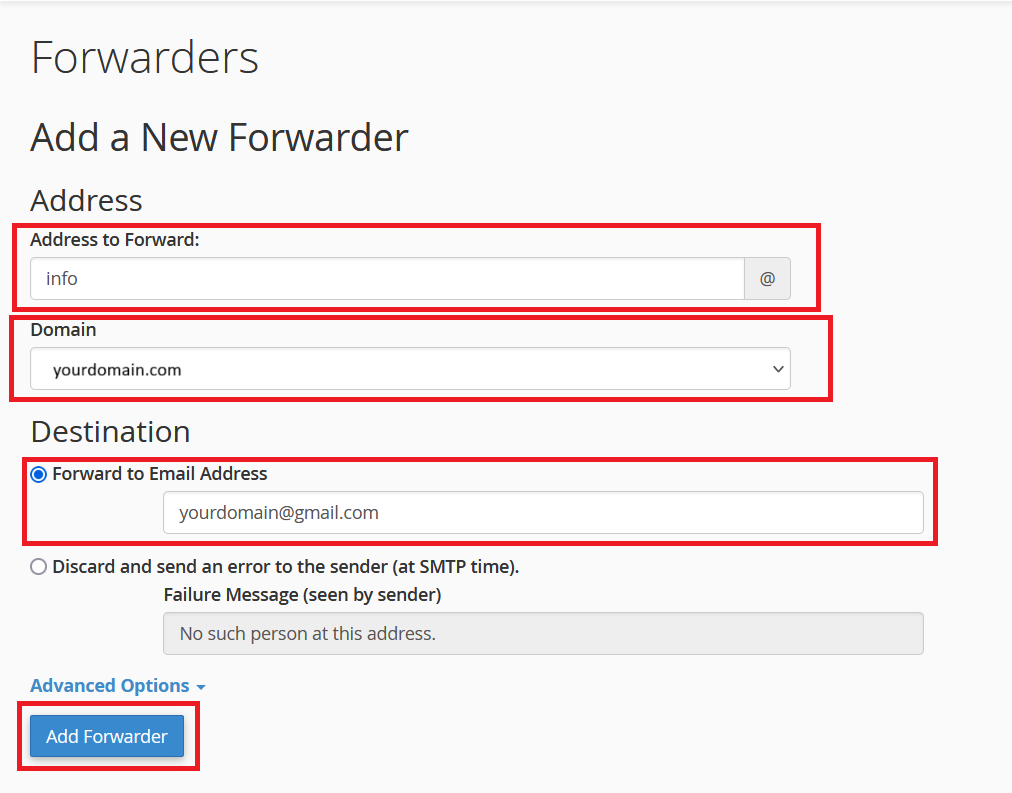
- Enter the mail address from which you wish to forward the e-mails in the "Address to Forward" textbox (Ex: info, sales etc.)
- NOTE: Do not enter the full mail address in the "Address to Forward" textbox, only the username of the mail account is required
- Select the domain for which the entered mail address corresponds to from the "Domain" drop down list
- Enter the mail account address to which the mails should be forwarded to in the "Forward to Email Address" textbox (Ex: yourname@gmail.com)
- Click on "Add Forwarder"
(Visual Representation)

If proceeding with "Add Domain Forwarder" option, kindly follow the below given steps:
- Select the domain for which you wish to forward the all the relevant mail accounts associated with it, from the "Domains" drop down list
- Enter the domain you are forwarding the mails to, in the "to" textbox (Ex: yourdomain.com)
- NOTE: To send all email for a domain to a single email address, change the Default Address for that domain.
- Click on "Add Domain Forwarder"
(Visual Representation)

